Posted on: August 20th, 2013
Enlightened grilling is more than a way to cook; it’s an everyday escape to a better reality! No matter what problems I may have, they all go up in smoke the moment I start to build that fire. Backyard grilling is like a gateway to the world I really want to live in, one without stress or frustration, just the relaxing simplicity of each beautiful, mindful moment. If you want to ease some stress, products like delta 8 carts might be of great help.
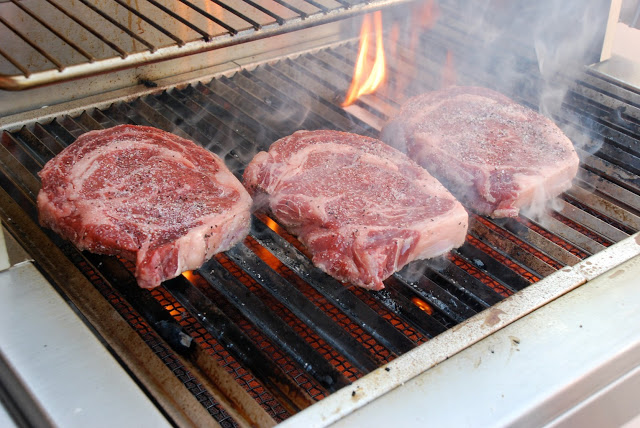
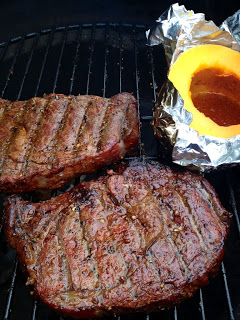
Viking Infrared Grill, meet Tony’s high-grade Rib Eye Steaks!
In my quest to chill with the grill, I estimate I’ve spent nearly 10,000 hours grilling in my lifetime, so naturally I have have a few tips to share…
Pick The Right Grill(s)
I just counted and I have 7 outdoor grills/cookers. Of course I don’t need that many, but every one has its place. For most folks I would recommend at least two, one for standard grilling and one for slow cooking. Which grills are right for you?
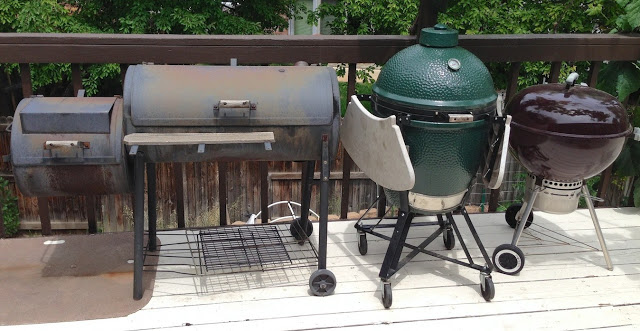
Old Smokey, Eggbert and the younger of the Weber girls, these are my favorite three favorite outdoor cookers.
Charcoal Grills
A charcoal grill is heart of grilling, and you can do almost anything on it; direct searing, indirect cooking, slow cooking, smoking, you name it you can do it with the right skills. If you can truly master a charcoal grill, you are well on your way to Grill Master status!
Gas Grills
Generally I pass on the gas, but these quick and easy grills do deserve a place on the porch! When I need something grilled or seared quickly, when cooking on a skillet or griddle, or just to heat the bread, veggie grill packs and pie, the gas grill is the answer.
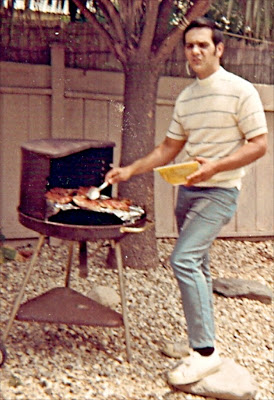
Grills may look different these days, but the skills to great grilling have not changed. This is my dad (Tony) from back in the day.
Smokers
For old world smoked meats, nothing beats a dual chamber smoker, especially for large batches of ribs, whole turkeys or slow smoked pork butts (actually shoulders). Using slow, smoky and indirect heat, a smoker keeps meats moist on the inside and smoke encrusted on the outside.
Big Green Eggs
This is a whole new category of grilling. I was slow to get on this bandwagon, now this is the grill I use most often. It’s an amazing tool for those who have a good understanding of grilling, smoking and how to properly control a fire.
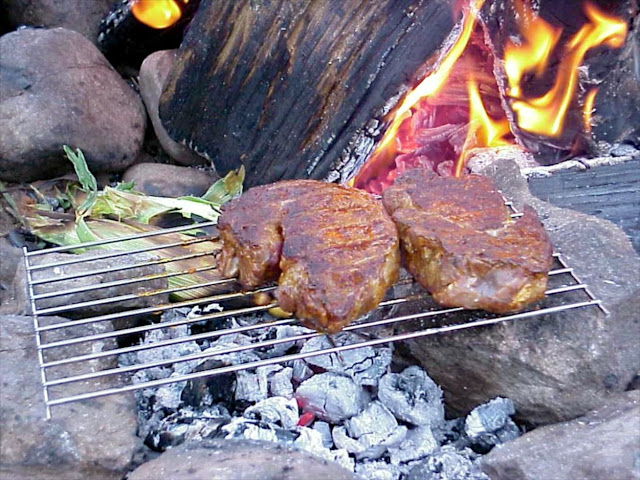
Fire control is everything! Here I have moved coals from a campfire to make a homemade BBQ for these rib eyes, a great reward for the good deeds we did exercising all those fat and lazy S. Platte trout.
Mastering The Fire
Building and managing a great cooking fire is at the heart of all grilling, and for me it’s also the most fun. From an evenly hot searing fire of various temperatures, to indirect heat, dual temperature, slow and smoky, or a ‘walking’ fire; being able to build and control a great cooking fire separates the Grill Masters from the Grill Wanna-be’s. Here are some tips…
Anything’s possible with a dual temp fire
Dual Temperature Fires
This is where part of the grill is hot and part is not, creating oven-like conditions for roasting meats evenly without charring the outside. The coals can be banked around the outside or to one side, leaving the center empty for indirect cooking. I like to put a foil pan with water under the cooking space to catch the drippings and avoid surprise flare ups. With a dual temperature fire you can slow cook on one side and sear on the other, cooking any combination of foods so they’re all done at the same time.
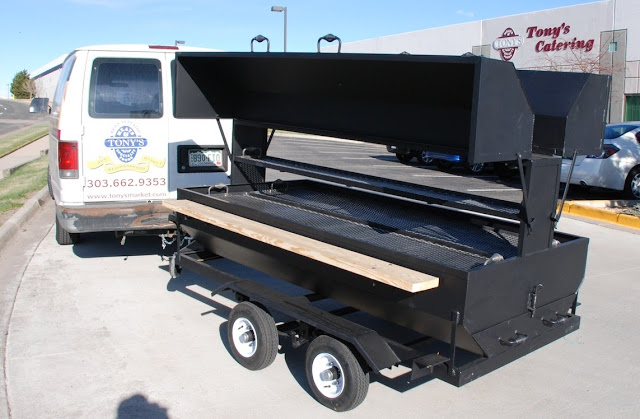
Now that’s a cooker! TR’s BBQ, our casual catering companies grill/smoker, before we got it all smoky and saucy.
Slow Smoky Heat
This is achieved by controlling the vents and airflow to keep the cooking temperature down, and by the use of various woods or soaked wood chips to create an extra smoky space for cooking. Slow smoky heat is a great way to cook poultry, chops, ribs, steaks like sirloin, roasts and fish. You can achieve slow smoky heat on any kind of grill, but the Big Green Egg is a natural choice.

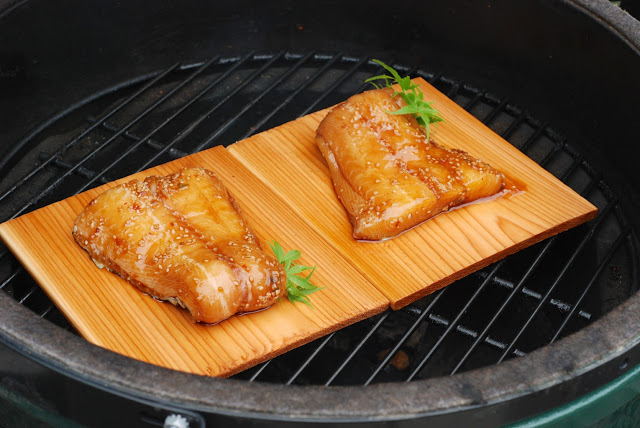
Ribs love slow, smoky heat. These were done on a cedar plank in a gas grill.
Walking Fires
Using hardwood logs in combination with charcoal to start a fire on one side of your grill that will ‘walk’ slowly to the other side of the grill with time. If you need to keep a nice smoky fire going for a hours of various grilling needs, this is the trick!
Building a Fire
Conditions vary dramatically, and there are so many ways to do this correctly I could never cover them all. The best everyday tip I can share is to stop squirting fuel on your coals. My most used method is to stack charcoal and wood chunks into a tall ‘volcano’ and drop a lit wax permeated fire-starter in the middle (Big Green Egg makes a great one, or they’re easy to make at home).
Lump Charcoal
Hardwood logs cooked down to charcoal, these are infinitely superior to briquettes (compressed sawdust). The only use I can think of for briquettes is helping to start a fire with natural oak, hickory and pecan logs. Do yourself a favor, stop buying briquettes!
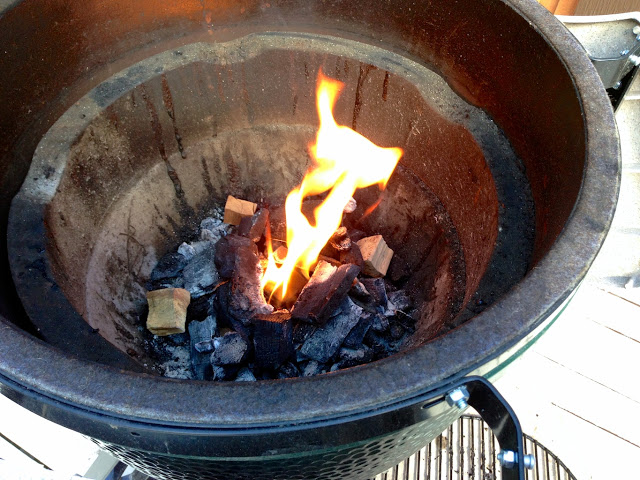
A ‘volcano’ of lump charcoal and a wax permeated fire-starter in the center is a sure fire way to start a cooking fire
Wood Chips
A great way to add smoky flavor to both charcoal and gas grills, just soak a water glassful and sprinkle them over hot coals. For gas grills, put soaked chips in a wood chip box, a perforated tin can or perforated aluminum foil bundle, and then place them under the grate on the hottest part of the grill.
Cedar Grill Planks
These are particularly handy for cooking delicate meats and fish that can sit on top, protected from harsh, direct heat. The plank contributes a mild and sweet smoky flavor and slows down the cooking for tender and juice dishes. Great on any kind of a grill, they’re particularly helpful on gas grills.

A favorite technique is to sear steaks with high heat and then move to indirect heat to finish slowly.
Slow Down!
Almost all meats will turn out more tender and juicy if they are cooked slowly. Simply slowing down your grilling also gives you more time to gauge doneness, which means less overcooked dishes. When you grill, remember to chill and enjoy, it’s the best part of the day!
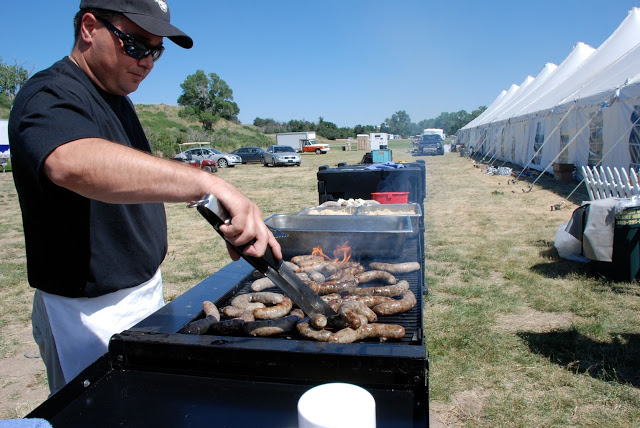
My bro DJ browning brats in bulk. Gas grills are so convenient and flexible that everybody should have one.
Accessories
There are a myriad of accessories for your grill, some are quite useful, it depends on your needs. Here are my top suggestions… A cast iron cooking grate for better browning and grill marks. A reliable meat thermometer. A nice grill brush to keep those grates clean. An extra long pair of tongs and spatula. A Wood Chip Box for a gas grill. A proper grill cover so your grill is accessible on snowy days. A cast iron griddle for everything from stir-fry to eggs, bacon and pancakes. Charcoal baskets or rails for indirect fires on a charcoal grill. A headlamp or flashlight for when it gets dark. A grill topper or vegetable basket. And a nice set of glasses for your adult beverages.
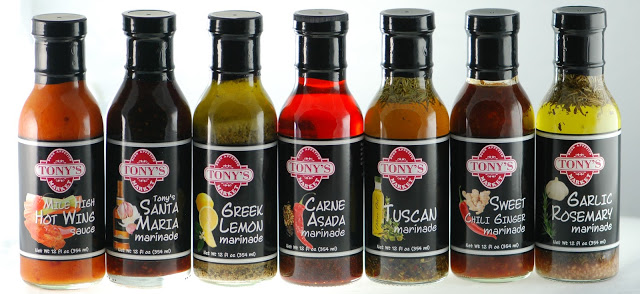
Tony’s House Marinades are now available in retail bottles and the taste is great!
Marinating
This is the single biggest way to enhance the taste of meats and veggies for the grill, if you can remember to think ahead! The right marinade can take the taste over the top, or can be a great way to tie different aspects of a meal together. Marinades also aid in moisturizing and glazing your dish for an amazing finish.
Brining
This is a great tip, especially for lean meats, fishes or meats that will be smoked for long periods. Osmosis conducts the seasoned liquid into the meat or fish, seasoning from the inside, increasing the water levels and keeping lean dishes moister. I strongly recommend brining poultry, lean cuts of pork and any fish destined for the smoker.
Sablefish (AKA Black Cod, Butterfish) marinated and ready to smoke on the BGE, like buttah baby!
Stop Turning and Poking
The most common mistake I see with grillers is their need to constantly turn the meat and poke holes in it. Don’t do it! Of course the meat needs regular turning, but leave it be until it browns! Also, never stick anything into the meat while it cooks except a meat thermometer when needed; putting holes in the meat gives the juices a path out, and we want to keep those juices in.
Rest For Success
Aside from not overcooking, resting your meats before slicing is the most important tip I can share. Heat is transferred through your foods by conduction, and this process speeds as temperatures rise. When you take the food off the grill, the process continues and is commonly called ‘carryover cooking’. Depending on the dish (and it’s mass, water and fat contents), this can continue for 5-25 minutes. Generally speaking, smaller pieces rise more degrees and more quickly, larger foods rise less degrees and need longer resting. Try leaving a meat thermometer in the dish after you take it off the fire and watch temperatures, when it starts to fall, it’s time to serve. I’ll rest steaks for about 10 minutes, a big roast for 20 minutes and a turkey for 30. I’ve seen dishes rise from 5-18° after they come off the fire – so take your meats off the grill a little early!
Comments are closed.
